
Learning how to soundproof a bathroom and toilet room door in your home can be a sensitive topic. The bathroom can be one of the most embarrassing rooms in your home.
Especially if you have family or friends over, nobody likes to have to use the restroom because of an upset stomach from dinner or from being sick.
Another problem is a noisy toilet in general. Some toilets are a lot louder than others when they are refilled after a flush.
Don’t forget about the loud banging toilet seat. If you have kids in your house or a woman, then you may constantly be hearing the toilet seat cover smack against the toilet and the bottom seat.
The best way to prevent all of these scenarios is to simply reduce the noise from your bathroom door and toilet altogether.
There are a few weak points in your bathroom that are causing all these noises. This is primarily the bathroom door and the toilet itself.
The bathroom door is the area in your bathroom with the least amount of resistance for sound to travel through. Soundproofing the door will help with overall bathroom and toilet noises.
The next item we need to tackle is the actual toilet itself. Reducing the noise caused by flushing and refilling is the best fix, in this case, to further prevent noise exposure outside your bathroom.
After doing much research about this topic, I have broken it down into two main segments that you can follow in order to make your bathroom quieter.
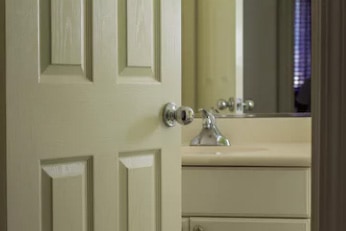
Soundproof the Bathroom Door
The first thing you should soundproof is the bathroom door. The door is the leading cause of sound escaping out of the bathroom in the first place.
The bathroom door has a lot of cracks, gaps, and crevices, and depending on the material. It is probably a hollow door. All of these factors in on how well noise will be kept inside the bathroom.
The main goal of soundproofing a bathroom door is to tackle all of these problems. Here are some of the best ideas and ways to prevent sound from escaping your bathroom door.
Install a Door Sweep
Do you see that gap underneath your bathroom door? It is probably a huge gap or a small gap, but it’s a gap nonetheless.

Leaving a gap is one of the worst things to have when trying to prevent noise from going through.
The first thing we need to do is eliminate the gap by creating a nice tight seal. The best way to do this is with a door sweep like the one that you can find on amazon.
This is a universal door sweep which means it can be installed on a variety of doors and gap sizes.
Before purchasing the product, it is recommended to take measurements of the gap underneath your door.
This is to double-check that this product will work for your door even though it’s a universal fit if you need to cut the sweep shorter, then you need to use a proper tool like a hacksaw to adjust the length.
If you find that the above door sweep is too big for your door and you don’t want to cut it with a hacksaw, then you can try this door sweep instead.
This door sweep is much easier to cut to size. All you need is a pair of scissors to cut it to the correct height. Cut it to size based on how big the gap is underneath your door.
Once you have successfully installed a door sweep, sound can no longer easily pass through the bottom of the door.
As an added bonus, it will also help keep dirt, debris, and insects from crawling into the bathroom.
Use a Soundproofing Blanket

A cheap way to do this if you don’t want to replace your door is to add a thick industrial blanket to the door.
Adding a thick blanket to the door will effectively create more density to help absorb any sound from going through the door.
These specific industrial blankets have grommets on them, which makes them great for easy installation.
The smartest way to install this blanket on your door without drilling or screwing into the door is to hang it with these adhesive hooks.
Each hook can support up to a total load of 13 pounds. The more hooks you place on your door, the heavier the load that can be placed on it.
This makes it perfect for hanging the industrial blanket. Installing the blanket with self-adhesive hooks also gives you the option of removing it at any time without leaving damage on your bathroom door, like if you were to hang it using screws or nails.
Install a Solid Wooden Door
This is the more expensive approach if you don’t want to hang a thick industrial blanket on your door.
Most of the doors that are installed in homes, excluding the front door, are mainly cheap doors.
These doors are either hollow or very low-density. This means that sound can effortlessly pass through the door because of this.
You can always take a trip to your local home improvement store to take a look at a new door for your bathroom in question.
Be sure to take measurements of your current door before heading to the store. This is to make sure you purchase a door that will fit.
Talk to a customer service specialist at your store and let them know you need a solid wooden door. Tell them you need it in order to help absorb sound or dampen the sound that will go through it.
Solid doors will be pricier than the other doors strictly due to the amount of material used in creating it.
Fully Seal the Door

The frame that your door is installed on currently isn’t an air-tight seal, even if it looks like it.
Using weatherstripping material can help create a nice tight seal that will give the extra soundproofing your bathroom door needs.
Installing the seal is pretty straightforward. The product comes with adhesive on one end, which means all you have to do is peel and stick.
Be sure to go over the entire left side, top, and right side of the door frame to create the seal.
Remember that we have already taken care of the bottom of the door with a door sweep. The sides and the top of the door frame are all that we are really worried about.
Once the weatherstripping has been applied to both sides and the top of the door, it will effectively create a door gasket. When you close the door, it should be close to being airtight.
Once you have taken care of the door sweep, the door frame, and the actual door itself, it’s time to move on to the toilet.
Soundproof the Toilet
Many people don’t realize that a toilet actually makes a lot of noise. The constant banging and clanking of the toilet seat can usually be heard down the hall or in the next room.
Another annoying noise that a toilet can make is the forever-running toilet noise. Have you ever flushed your toilet but you found yourself trying to mess with the fill-up mechanism because it was stuck or just not working correctly?
I actually had this experience almost every other day. My toilets fill valve would constantly get stuck and always took forever to refill the tank.
This caused my toilet to have abnormally long refill sessions that were not only noisy but a real pain in the butt to deal with all the time.
Here are some things you can do to fix the clanking of a toilet seat cover as well as quiet your toilet’s refill procedure.
Install Gel Pads on Toilet Seat Cover

These shoe gel pads will work perfectly for what we want in this scenario.
You will only need to use two gel pads for this to work. Take the first gel pad and place it on the top of the toilet seat cover.
The middle is probably the best, but it’s your choice. Wherever you plan to place it, just make sure that the cover touches your toilet’s tank when it is raised.
You will want to place the second gel pad on the bottom of the seat cover where it touches the toilet seat.
This next part is optional. If you have leftover gel pads, then you can place them underneath the seat cover to help with the impact from touching the toilet bowl.
Your toilet seat should now have gel pads in three different areas. This will help dampen and get rid of the noise from slamming toilet seats.
This is great to do if you have kids in the household or when you are up late going to the restroom and are very tired.
I’ve had my fair share of toilet seat slams when I’m trying to use the toilet at 3 am.
Here’s a helpful video that shows exactly where to place the gel pads for the best results.
Change the Toilet Fill Valve

Installing this toilet fill valve is the best solution to fixing a noisy and running toilet. This kit is high quality and is one of the best replacement fill valves on the market.
It quickly and efficiently fills up your tank after a flush which eliminates prolonged and unnecessary noises that come from a toilet after a flush.
How to Replace a Toilet Fill Valve
In order to install this new fill valve, you will first need to remove the lid on your toilet’s tank.
Next, make sure that you turn off the toilet’s water supply by turning the water shut-off valve clockwise. Turn it until it doesn’t turn anymore to make sure it is completely cut off.
You will then want to drain as much water as possible from the tank. In order to do this, you just need to simply hold down the flush lever until the toilet is completely flushed.
Remove the remaining water with a cloth or a sponge.
You want to get this area as dry as you can. Underneath a tank is a nut that holds the fill valve to the tank. Loosen the bolt to remove the fill valve.
Some water may come out when you do this, so be prepared. Remove the old fill valve from inside the tank and replace it with the new one.
The new fill valve should fit similarly to how the old one was. Once the new fill valve is in, you will then need to adjust the float to the correct height based on the manufacturer’s guidelines.
Attach the new refill tube to the overflow pipe. Reattach the water supply hose to the tank.
Turn back on the water to your toilet and give it a nice test flush to see the difference.
I found this helpful video tutorial that you can watch to get a clearer understanding. It shows all the steps and parts that are involved with changing the fill valve.
Final Thoughts
Soundproofing your bathroom door and the toilet will dramatically decrease the amount of sound that will come out of your bathroom.
Overall I recommend performing all of these steps for the greatest results. If money is not an issue, then it would be best to purchase a solid wooden door instead of hanging a thick utility blanket on it for aesthetic and practical reasons.
Other than that, everything else is pretty straightforward.
Reinforce your door and quiet the noises that your toilet makes will make for a pretty good soundproofed bathroom.
